AWS DataSync was launched at re:Invent 2018, and while the idea is nothing new or revolutionary - copying data between the cloud and your on premise server - there is actually so much more happening under the covers…
What is AWS DataSync?
AWS DataSync is supplied as a VMware Virtual Appliance that you deploy in your on-premise network. It’s then configured and managed via the AWS console, and used to syncronise data between on-prem NFS servers and either an S3 bucket or an EFS filesystem in AWS. The appliance itself will be familiar to anyone who’s used the AWS Storage Gateway product in the past, as it in fact appears to be the same underlying thin appliance technology (the DataSync agent even reports itself as a ‘Storage Gateway’ on the administrative console of the appliance).
Limitations
There are a few important limitations you’ll need to be aware of if you’re considering using DataSync:
- Currently, the DataSync “Agent” is only supplied as a VMware Appliance (Not a massive surprise, as re:Invent 2018 was pretty VMware-heavy)
- However, I’ve tested this on Hyper-V (don’t judge me) by converting the disk image inside the OVA file using
qemu-convert -f vmdk -O vpc ...and it seems to work as expected
- However, I’ve tested this on Hyper-V (don’t judge me) by converting the disk image inside the OVA file using
- DataSync only supports NFS for the on-premise filestore (no SMB support for Windows fileshare migration)
- Only EFS or S3 are supported as targets - Amazon FSx targets aren’t supported
- You will need a minimum of 4GB of system RAM allocated to your VM. The official requirements state a minimum of 32GB RAM, but I’ve found you can get away with less for testing.
I had a chance to ask a couple of questions of the Product Manager for DataSync during re:Invent, and their message was that DataSync is very clearly positioned at on-premise migration, so don’t expect to see this supported in EC2 any time soon.
Your first copy…
The DataSync transfer protocol is where the magic lies. This is a proprietary protocol developed at Amazon specifically for the DataSync service. AWS claim a maximum transfer rates of up to 10Gbit/s, assuming your connectivity and storage can keep up!
There were plenty of warnings during the re:Invent sessions warning you to rate limit the transfer jobs if you have a shared Internet connection or you want to continue being able to use your storage during the copy. I assume someone learnt this the hard way!
We’re going to walk through setting up a basic transfer job to sync data from an NFS share to an S3 bucket in AWS.
Downloading and Starting the DataSync Agent
The agent is supplied as a VMware OVA image (that is, a pre-bundled VM configuration you can import into your hypervisor). Officially only ESX/ESXi is supported, but I’ll be testing this on VMware Workstation.
Download the DataSync Agent, unzip the file and import it into your VMware infrastructure. Once the appliance has booted, you’ll be presented with the login screen:
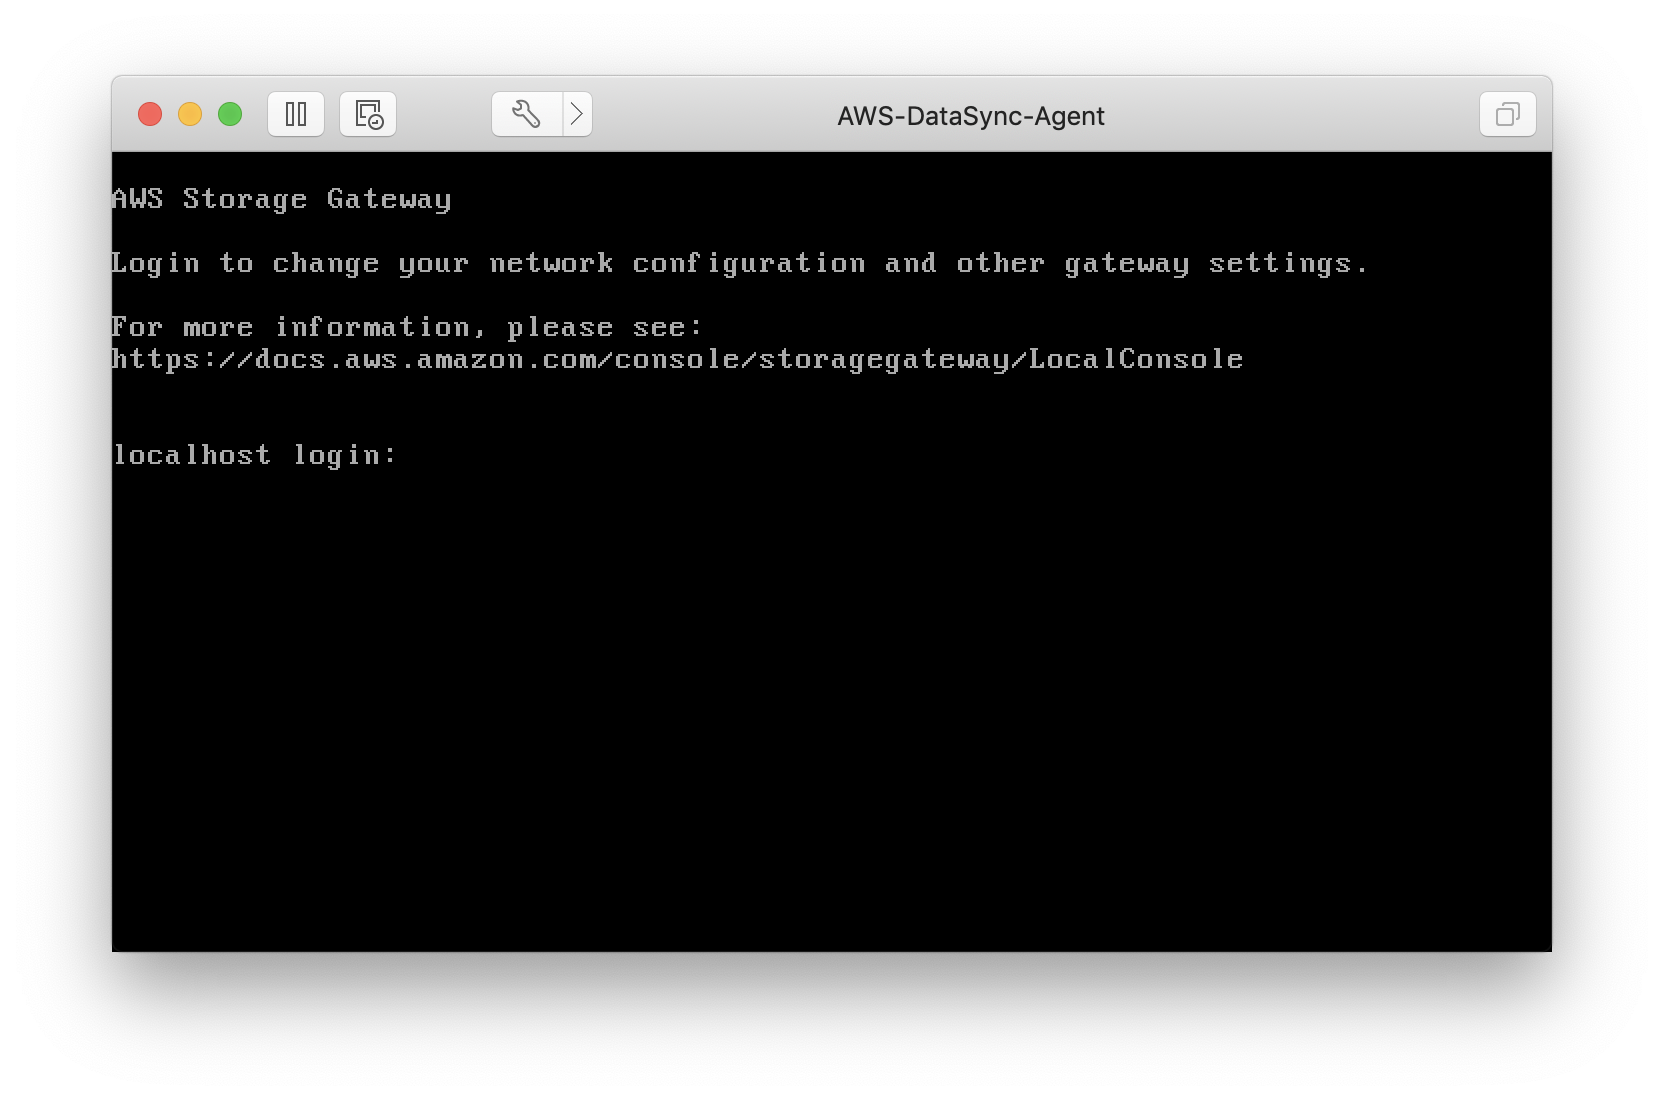
Once the appliance has started (note the references to “Storage Gateway”!) you can login with the username admin and the password password.
Assocating the DataSync Agent with your account
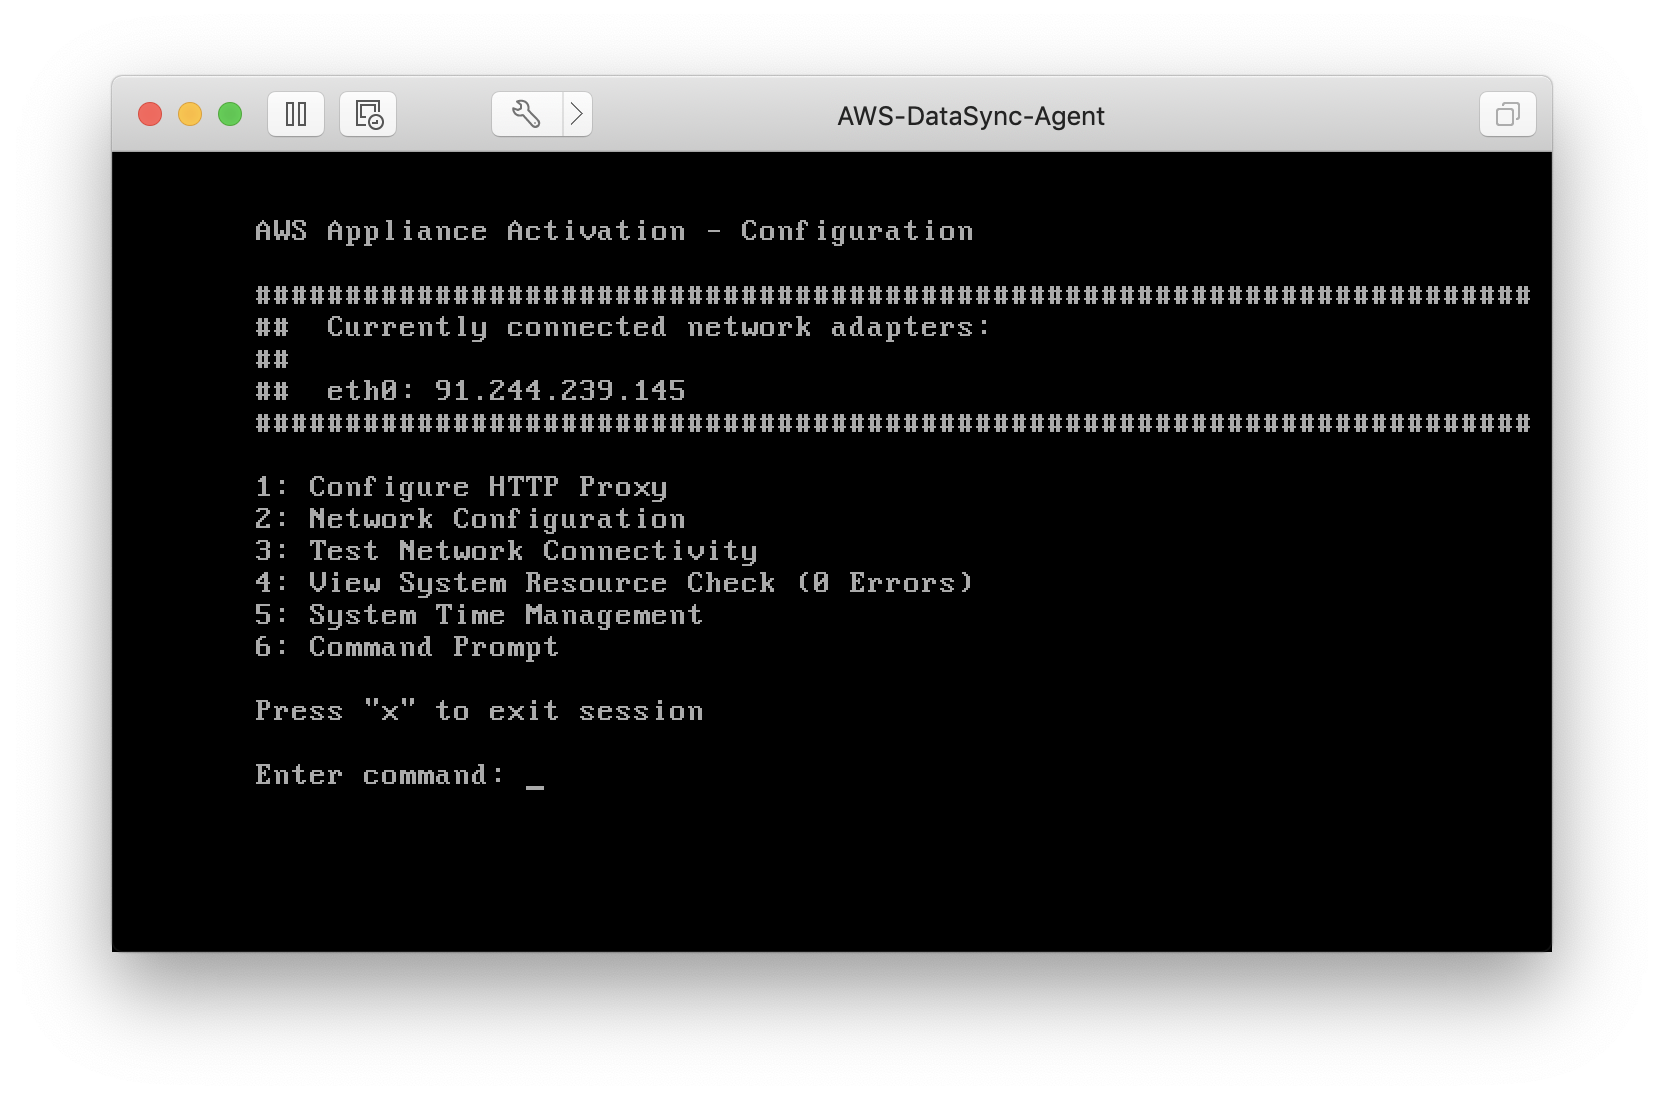
Once you’ve configured the appliance (such as setting a static IP address, or configuring your HTTP proxy details), you need to generate an activation key and associate the DataSync appliance with your account, via the AWS Management Console:
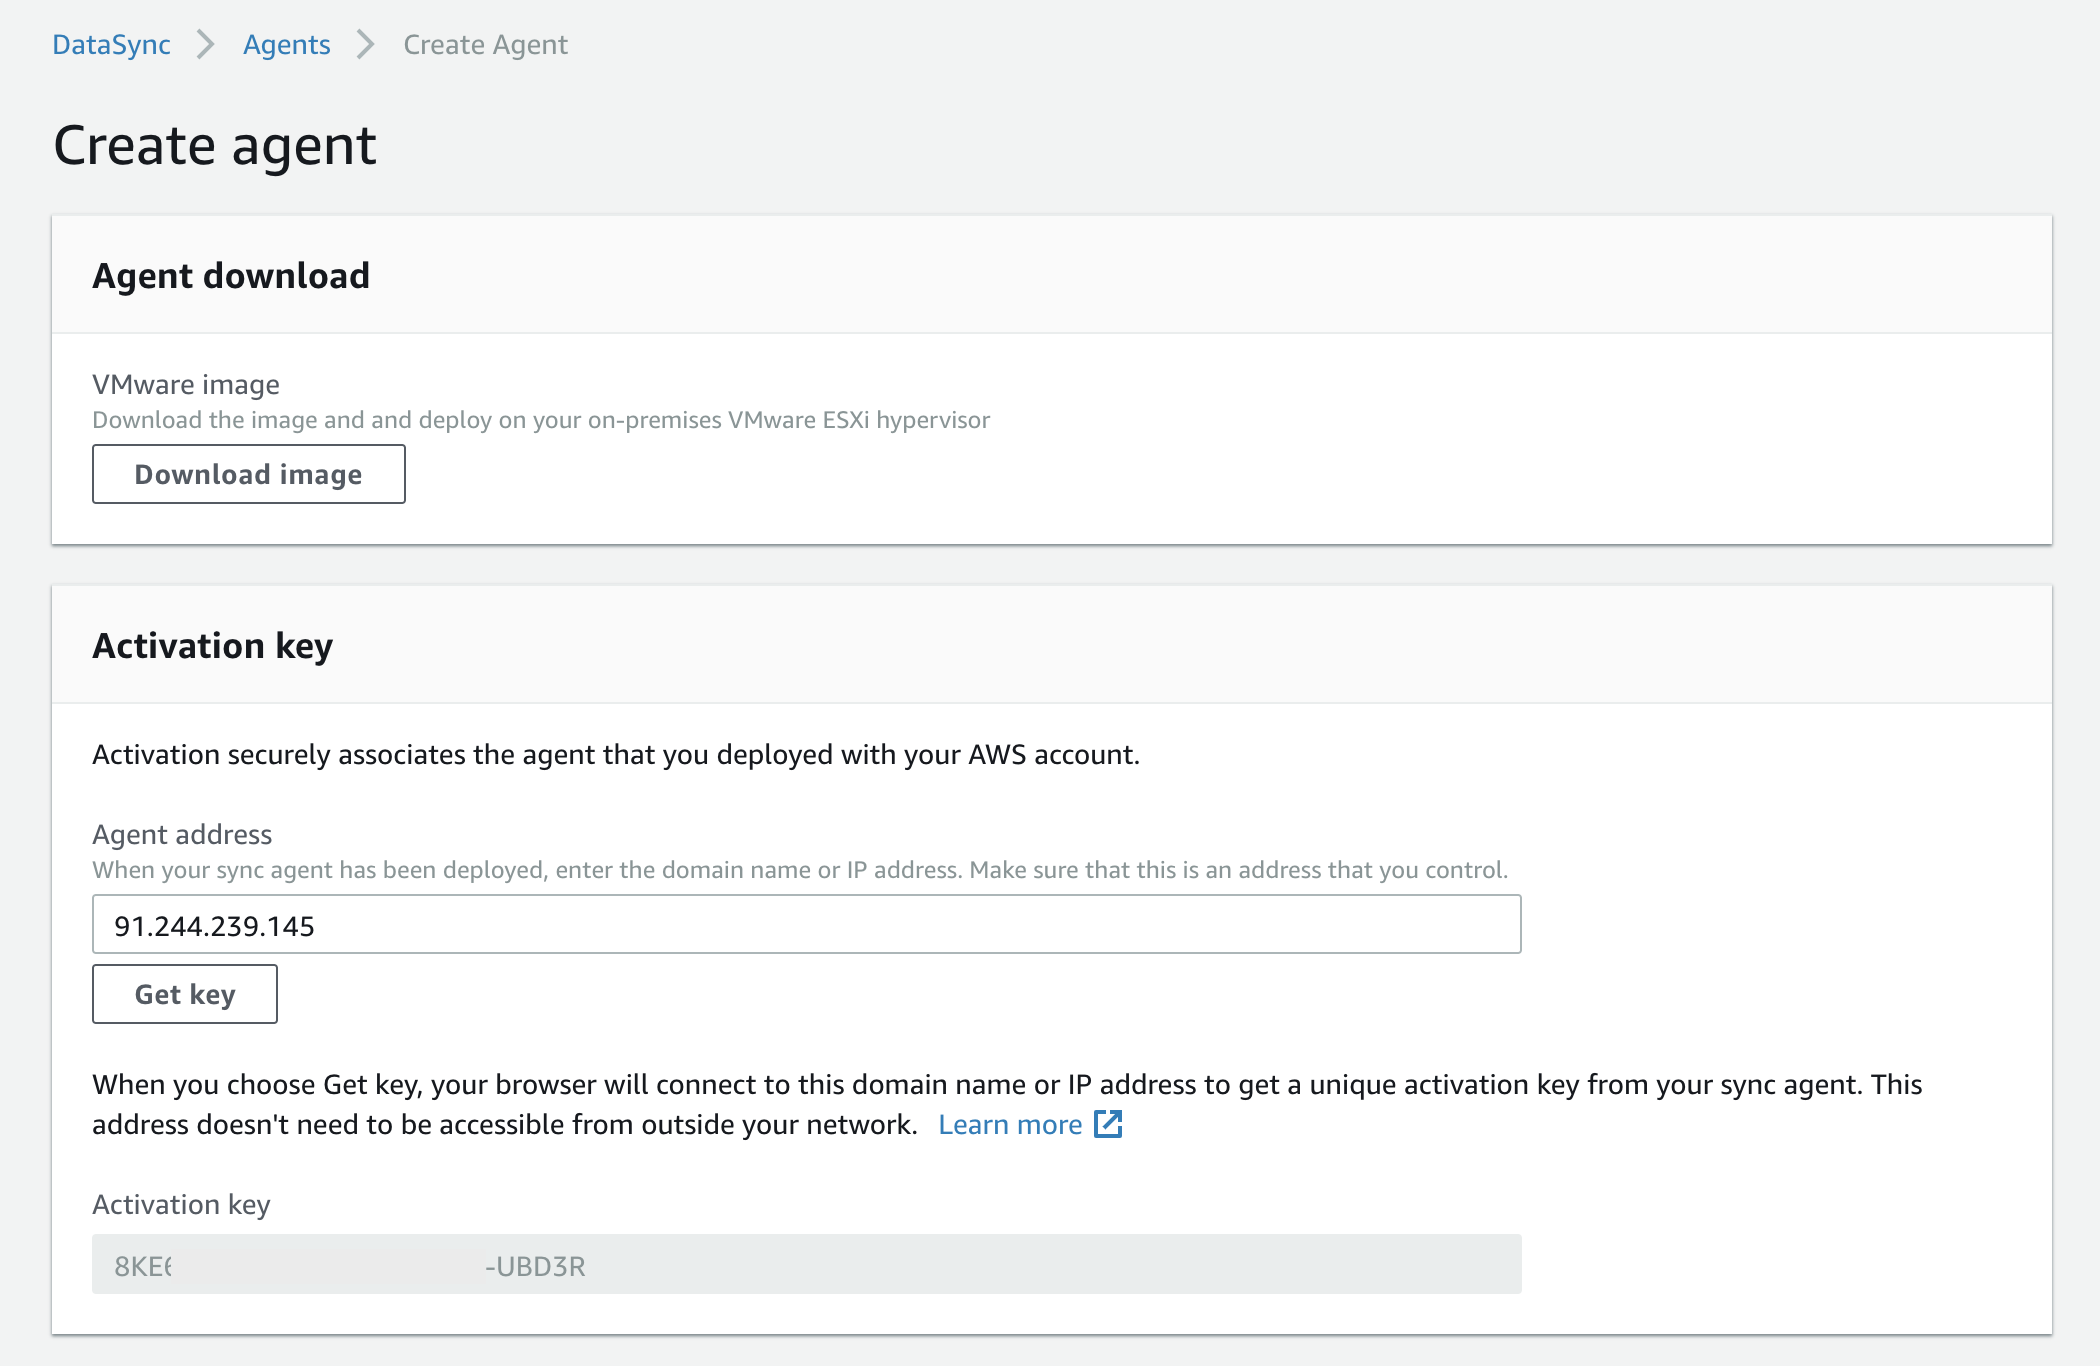
For this to work, you need connectivity from your web browser to the appliance IP address on port 80. AWS doesn’t require any inbound connectivity to the appliance - it’s all managed locally. Once you’ve entered your appliance IP and hit the ‘Get Key’ button, your activation token will be populated and you can give your agent a name and associate any specific tags (such as billing/cost allocation tags), and hit the ‘Create’ button. A few seconds later, you should be presented with a screen that looks like this:
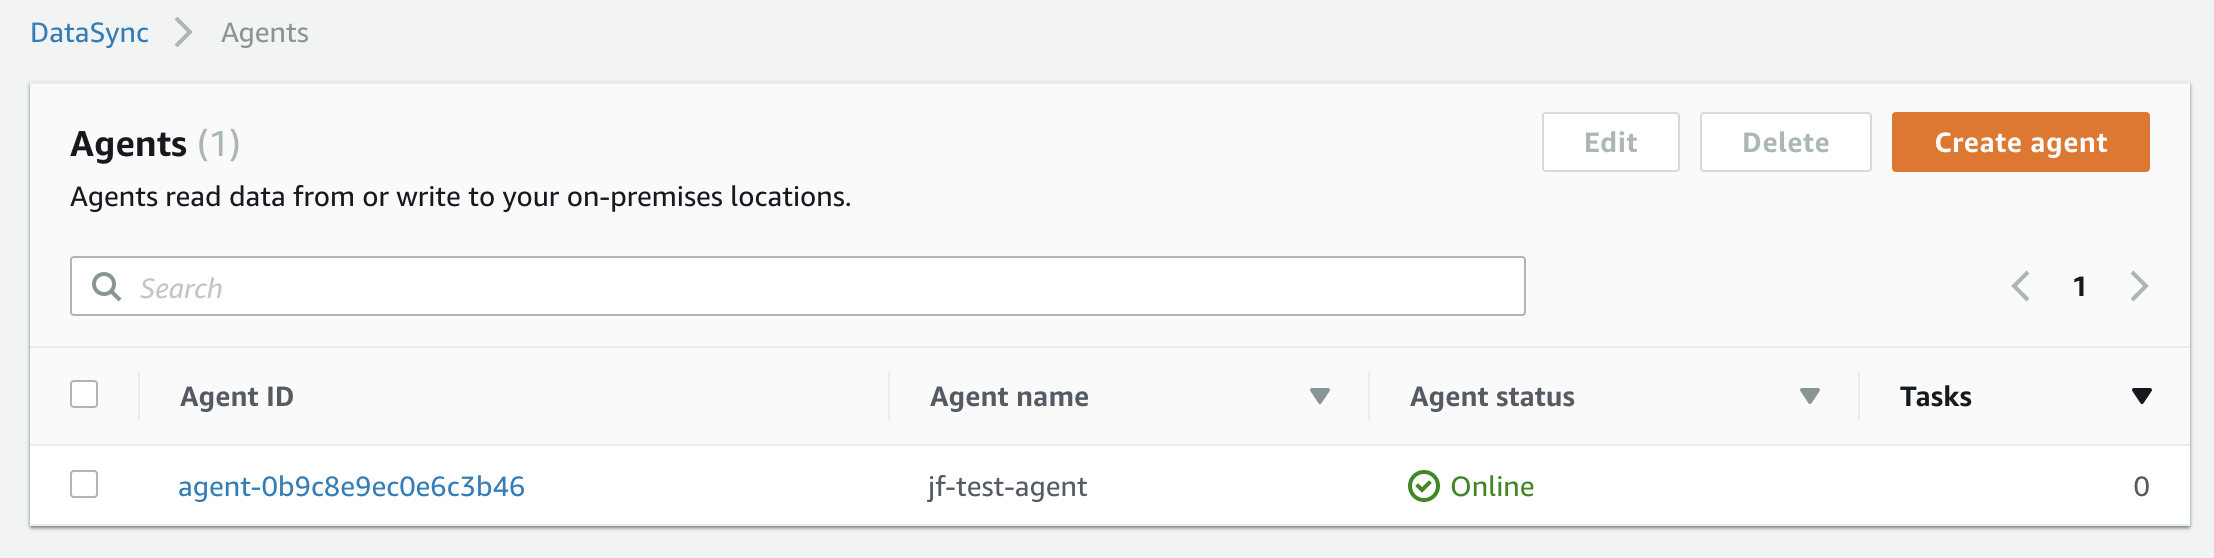
Here we can see that our agent, jf-test-agent is online and ready for us to assign tasks.
Creating our first transfer job
We need a dataset in order to test our synchronisation - and what better than a huge archive of cat pictures? I downloaded the public domain Cat Database via this AcademicTorrents torrent file. The cats were unzipped and stored on my local NFS server.
We can now create our task definition:
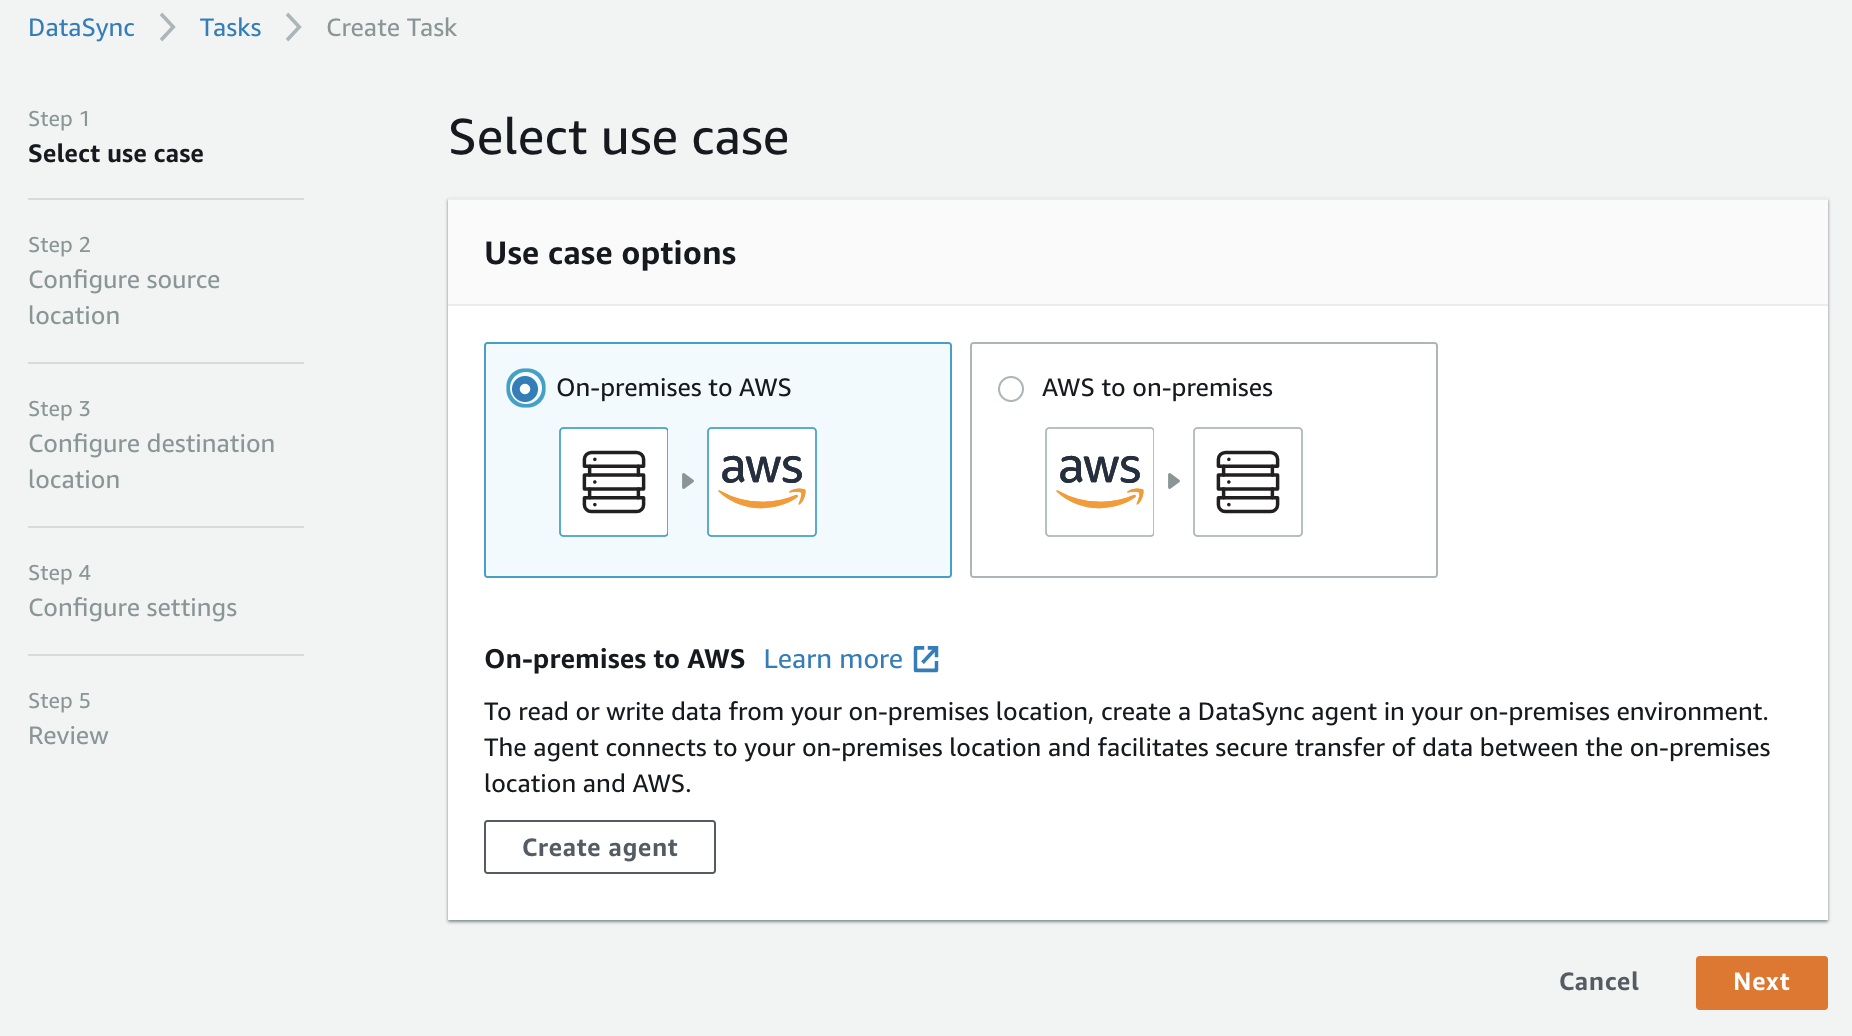
Step 1: Specify in which direction we want to transfer our data. We can copy data either from AWS or to AWS, in relation to our on-premise fileserver. In this example, we’re copying data to AWS (an S3 bucket, to be exact).
Step 2: We now need to setup our source configuration. The only option for ‘Location Type’ is an NFS server, so we select that. We then fill in the details of our NFS server and the path to mount.

NB: It’s worth noting that you can specify a sub-path on the NFS server rather than just the root, to copy selective directory trees rather than the entire contents of the mount point.
Step 3: Much like the previous screen, we now need to configure our destination in AWS. In this example, we’re using an S3 bucket. You can also choose an EFS filesystem.
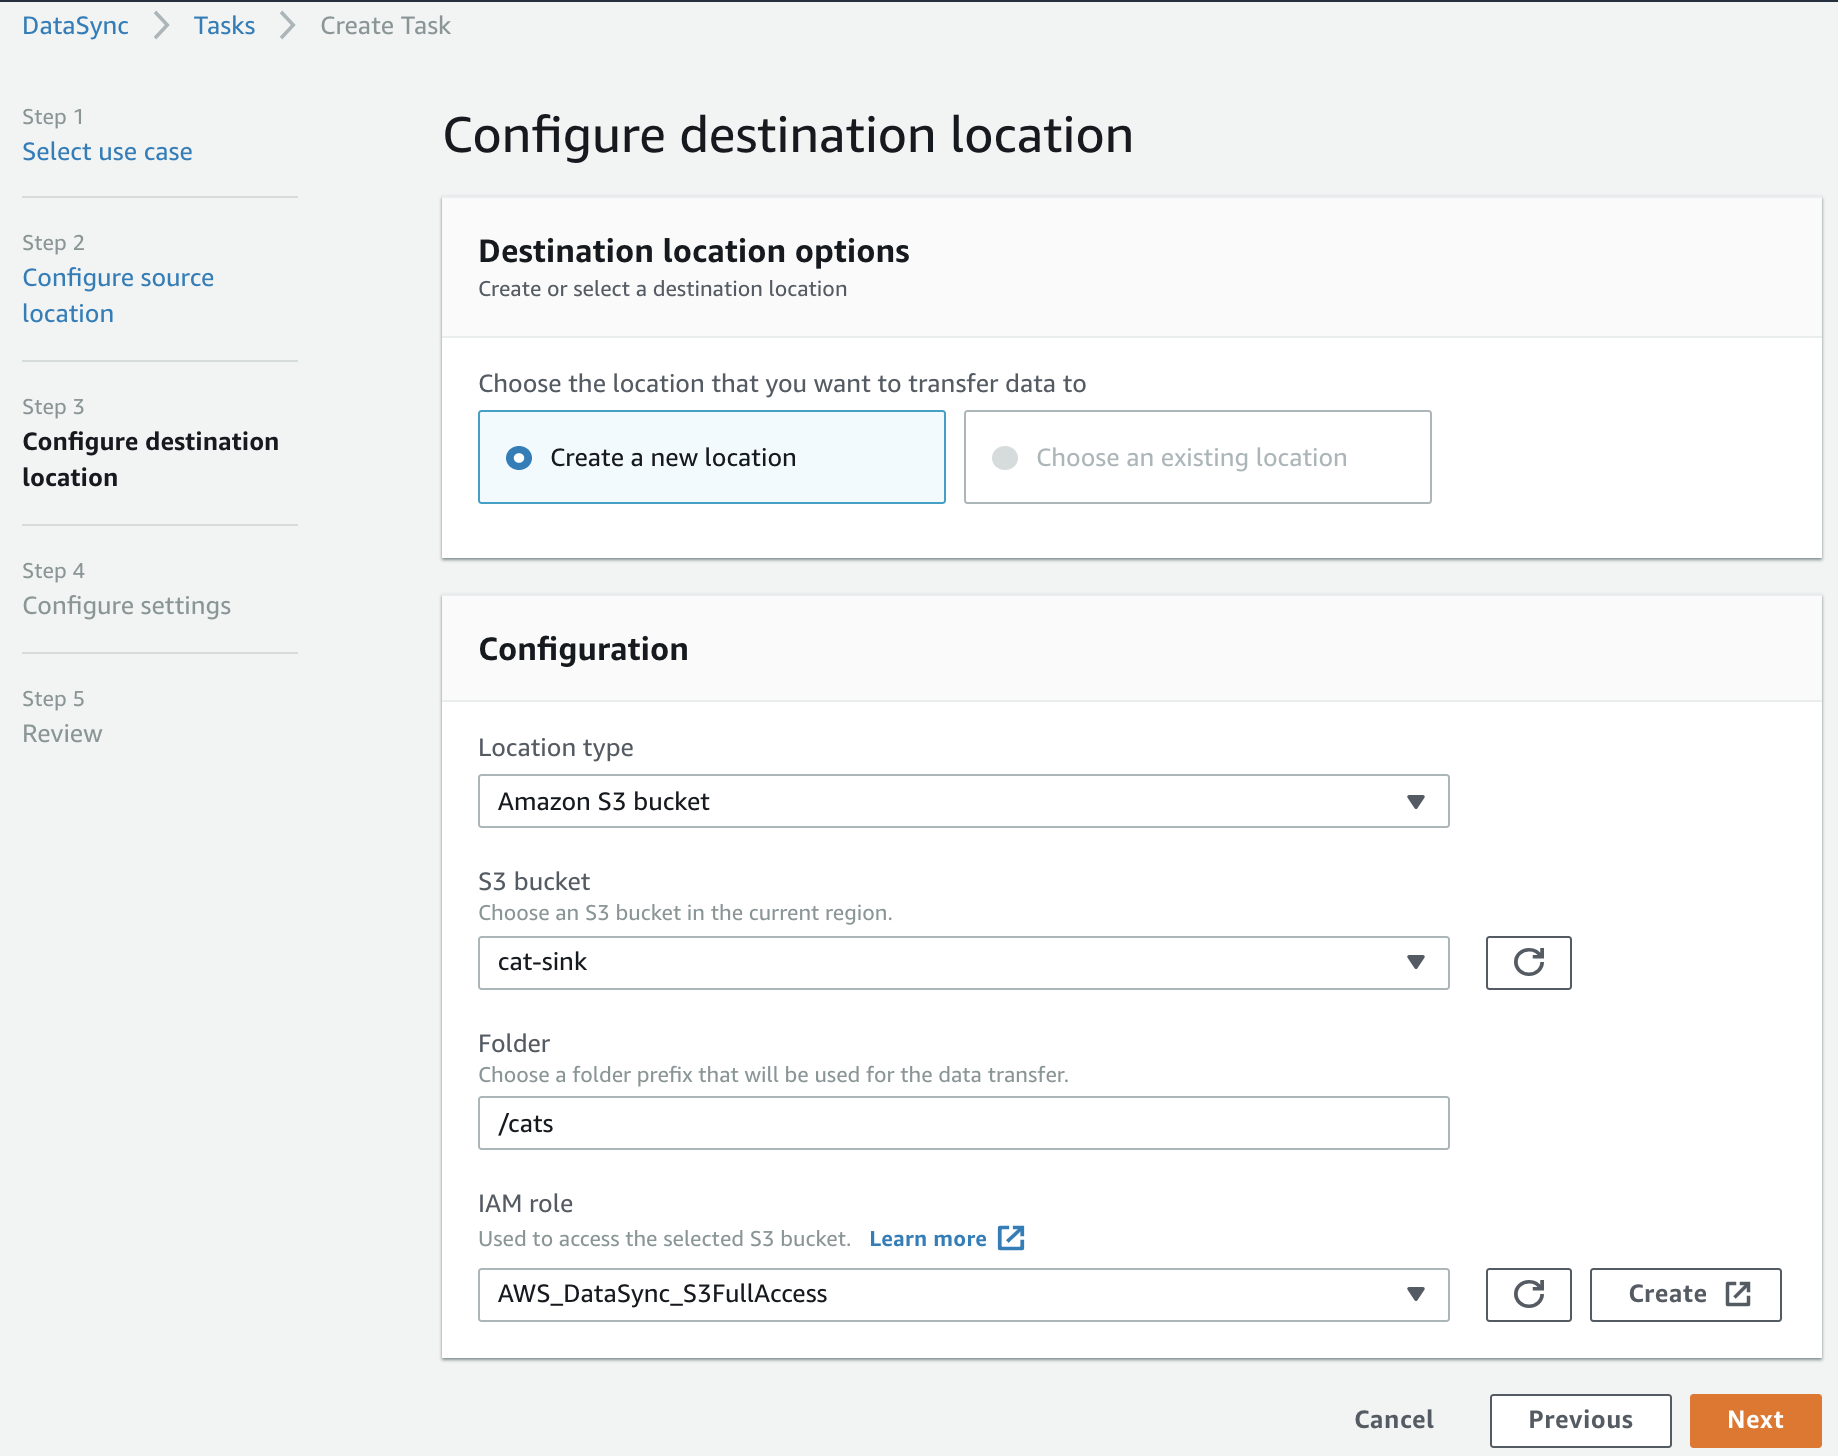
One limitation to be aware of is that the target must reside in the same account as the DataSync agent is configured for - it does not appear to be possible to use an S3 bucket in another account. The bucket must also reside in the same region as the DataSync agent.
When creating an S3 target you also need to specify an IAM role that the DataSync service can assume, with write permissions to your S3 bucket. For the sake of simplicity I’ve created a role with a trust policy for datasync.amazonaws.com and attached the AmazonS3FullAccess canned policy, but you will probably want to provide a least-privilege role for production use. You will need to create the IAM role yourself, there’s no prompting/auto-creation logic in the DataSync console
Full details on the required IAM permissions are in the documentation.
Step 4: Give your task a name (optional) and you’ve got yet another oppotunity to attach tags to the task component of the workflow.
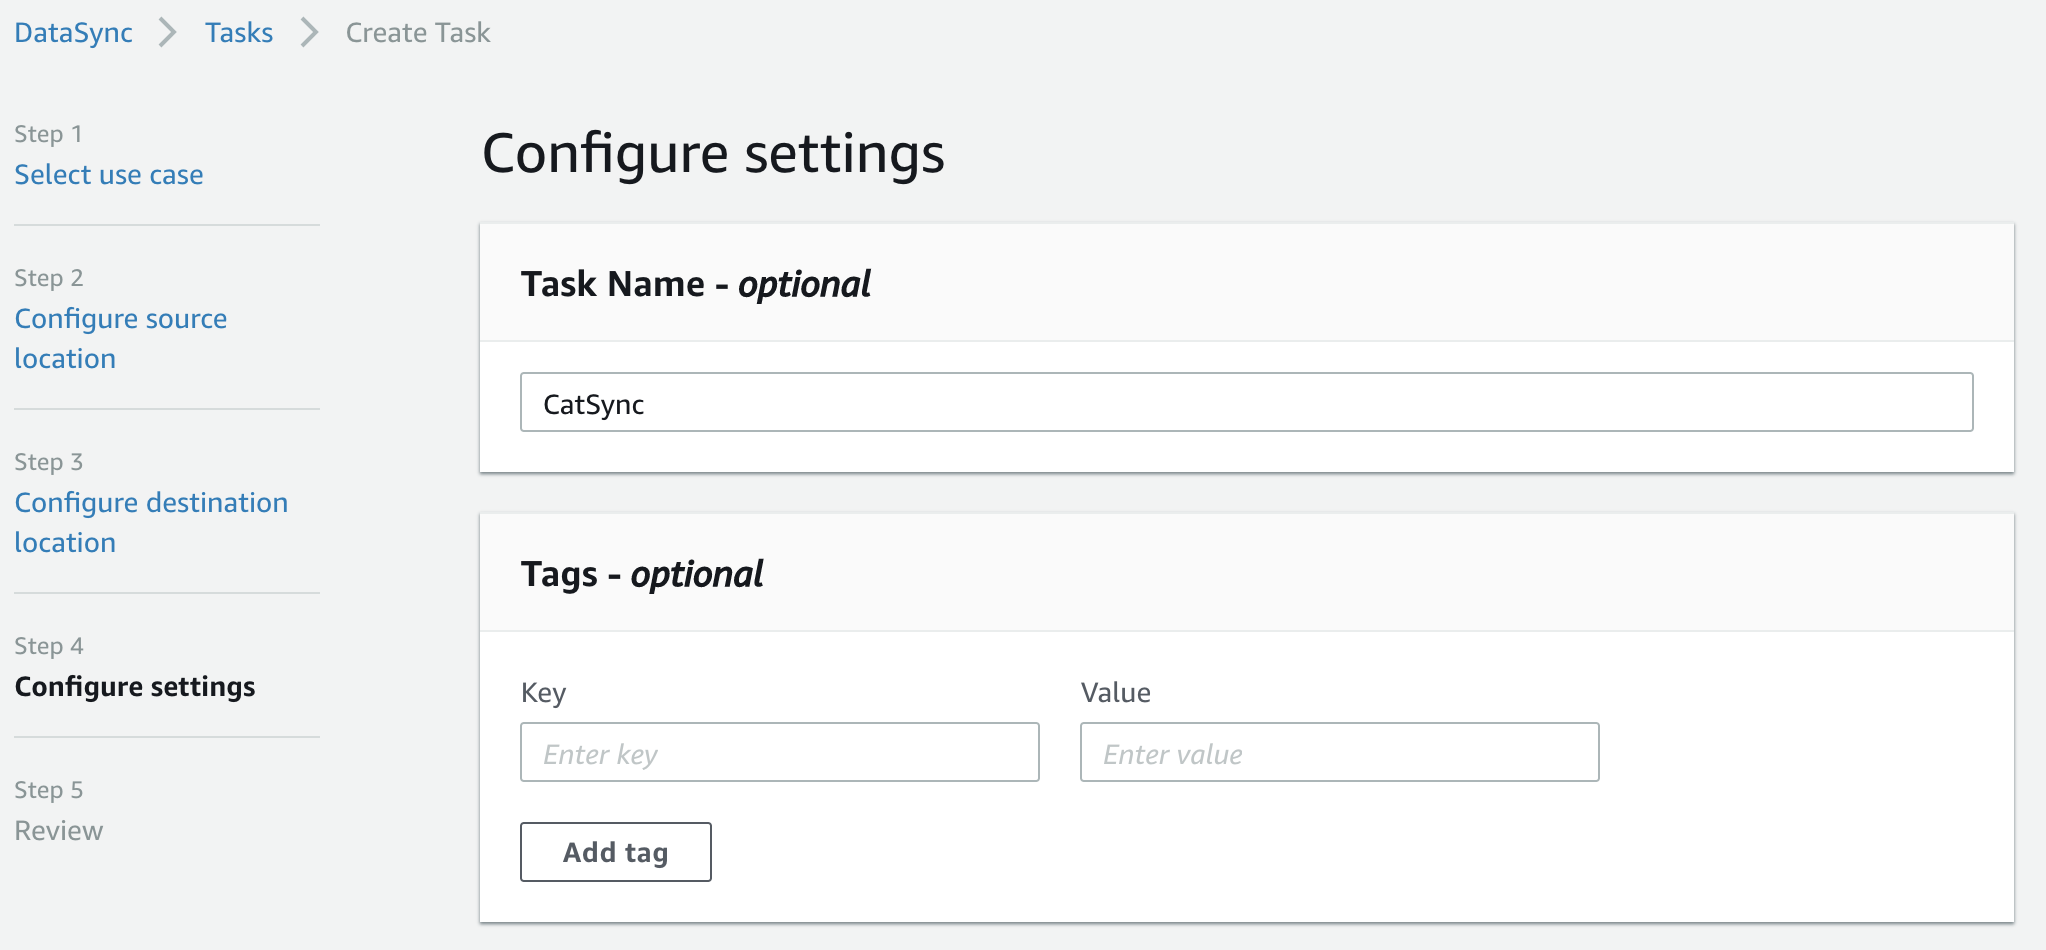
(It looks like the DataSync team have really gone to town on tagging - you can tag agents, tasks and locations, all seperately from each other!)
Step 5: You can specify the options for the transfer here. These include the ability to store file ownership and mode information as S3 metadata on the individual objects uploaded, as well as an option to not delete files on the target when they’re removed from the source. You can also opt to validate the transfer was successful by checking the ‘Enable verification’ option - but remember this will slow down the transfer due to the additional overhead of calculating the checksum for each file transferred.
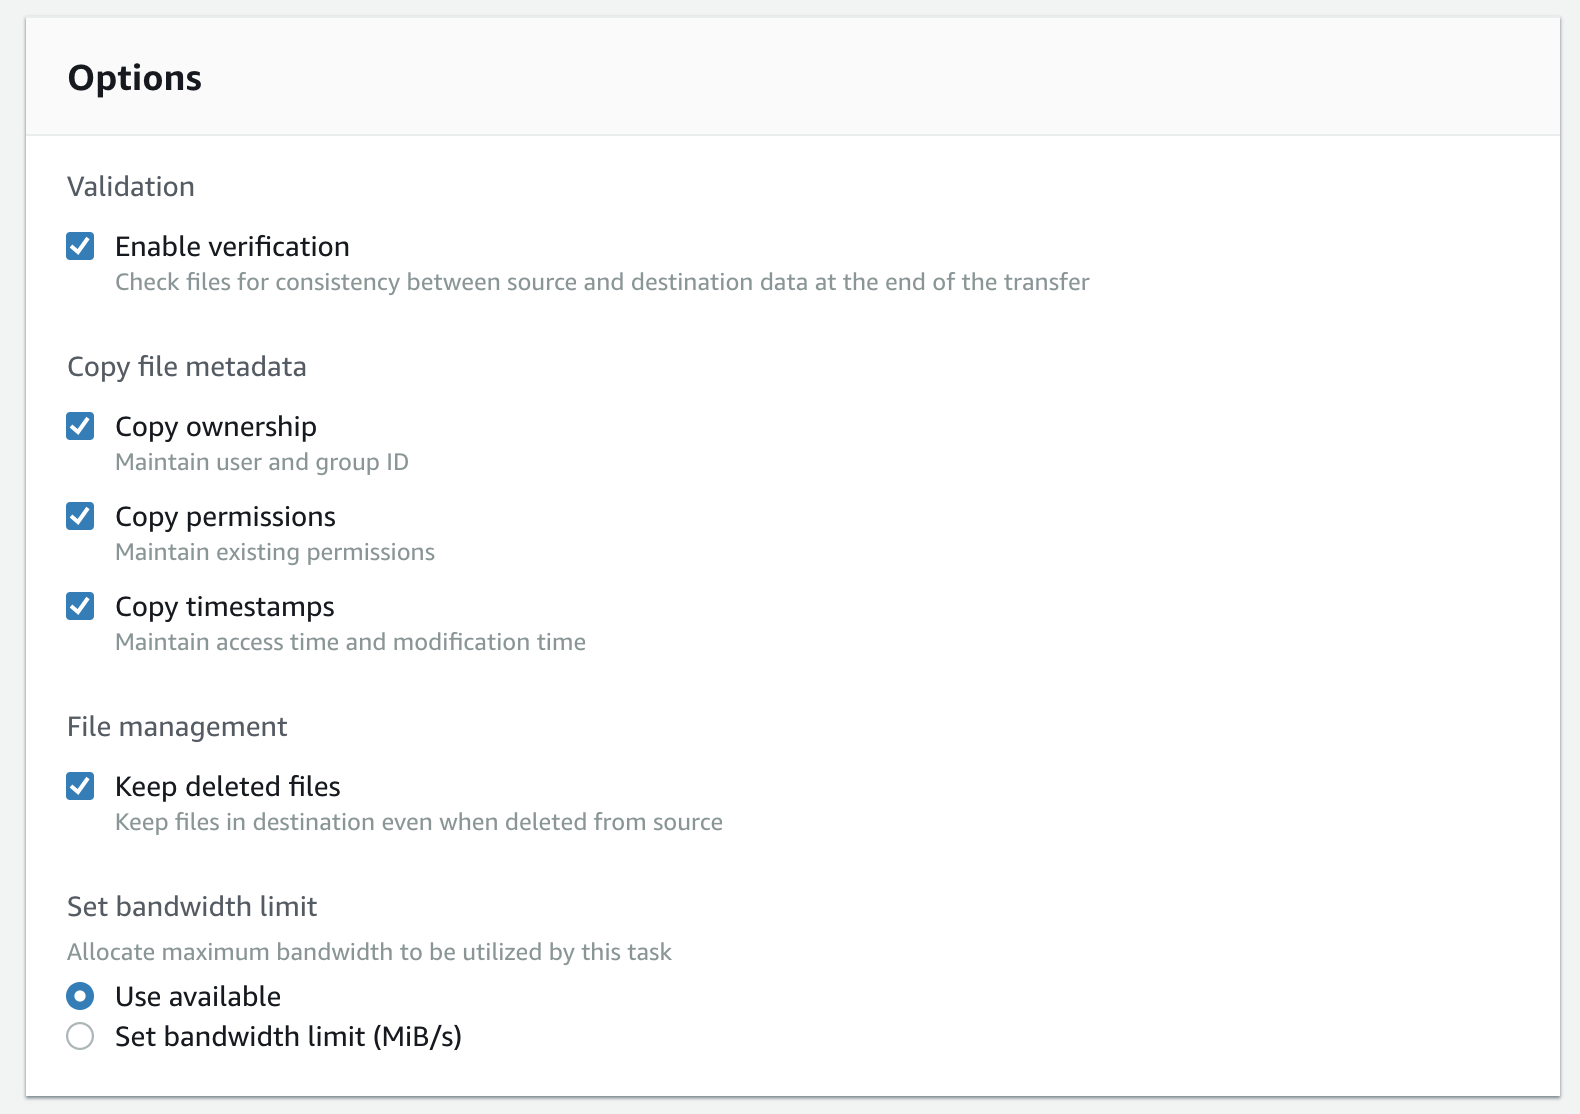
The “Keep Deleted Files” option is, in my opinion, one of the best features of the DataSync service, as it allows you to keep a minimal working set of data on-premise while being able to keep essentially limitless quantities of data stored in S3.
The metadata applied to the S3 objects by the DataSync service also appear to be the same as those used by the AWS Storage Gateway File Gateway, so you could provide an on-premise access to your ‘archived’ data via NFS while maintaining existing file access controls and permissions - neat!
Running our transfer task, and getting those cats into AWS
Starting the transfer job is as easy as selecting our new task, clicking the Actions menu and selecting ‘Start’. You can also ‘Start with overriding options’, which pops up the same options screen as seen in Step 5 above, and allows you to change them on a per-execution basis.
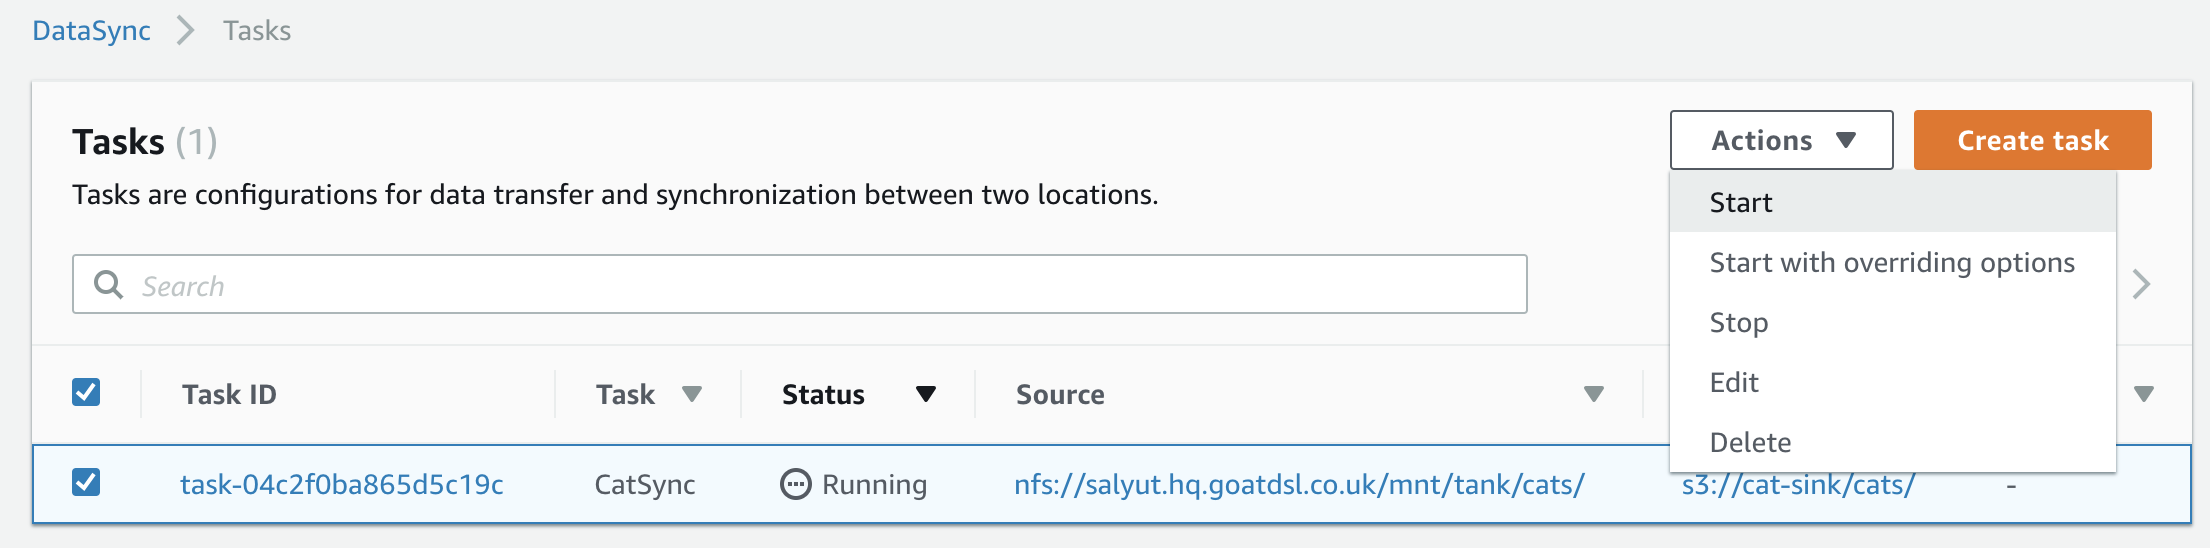
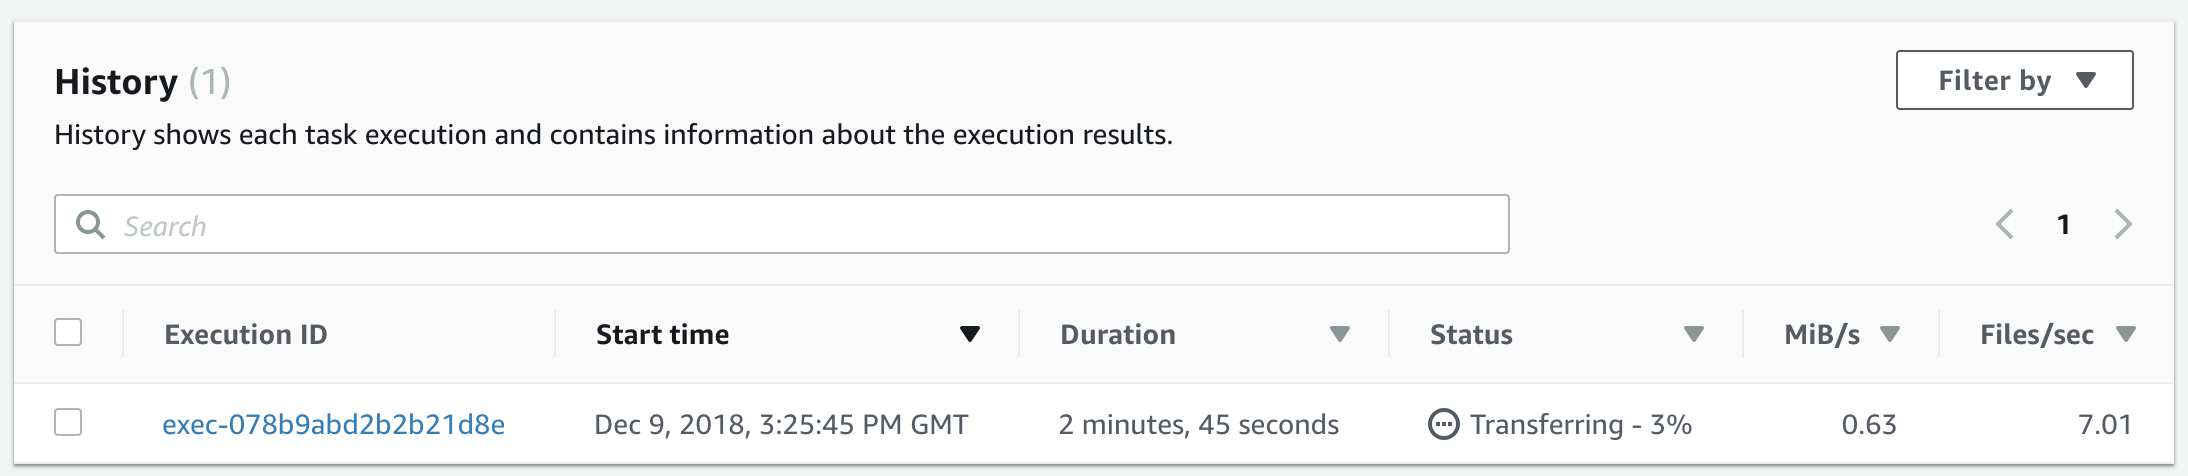
Clicking on the task ID and scrolling to the bottom of the page, we can see a quick history/overview of the previous exections of the task. As we can see, we have one instance of our task running, and we’re 3% complete.
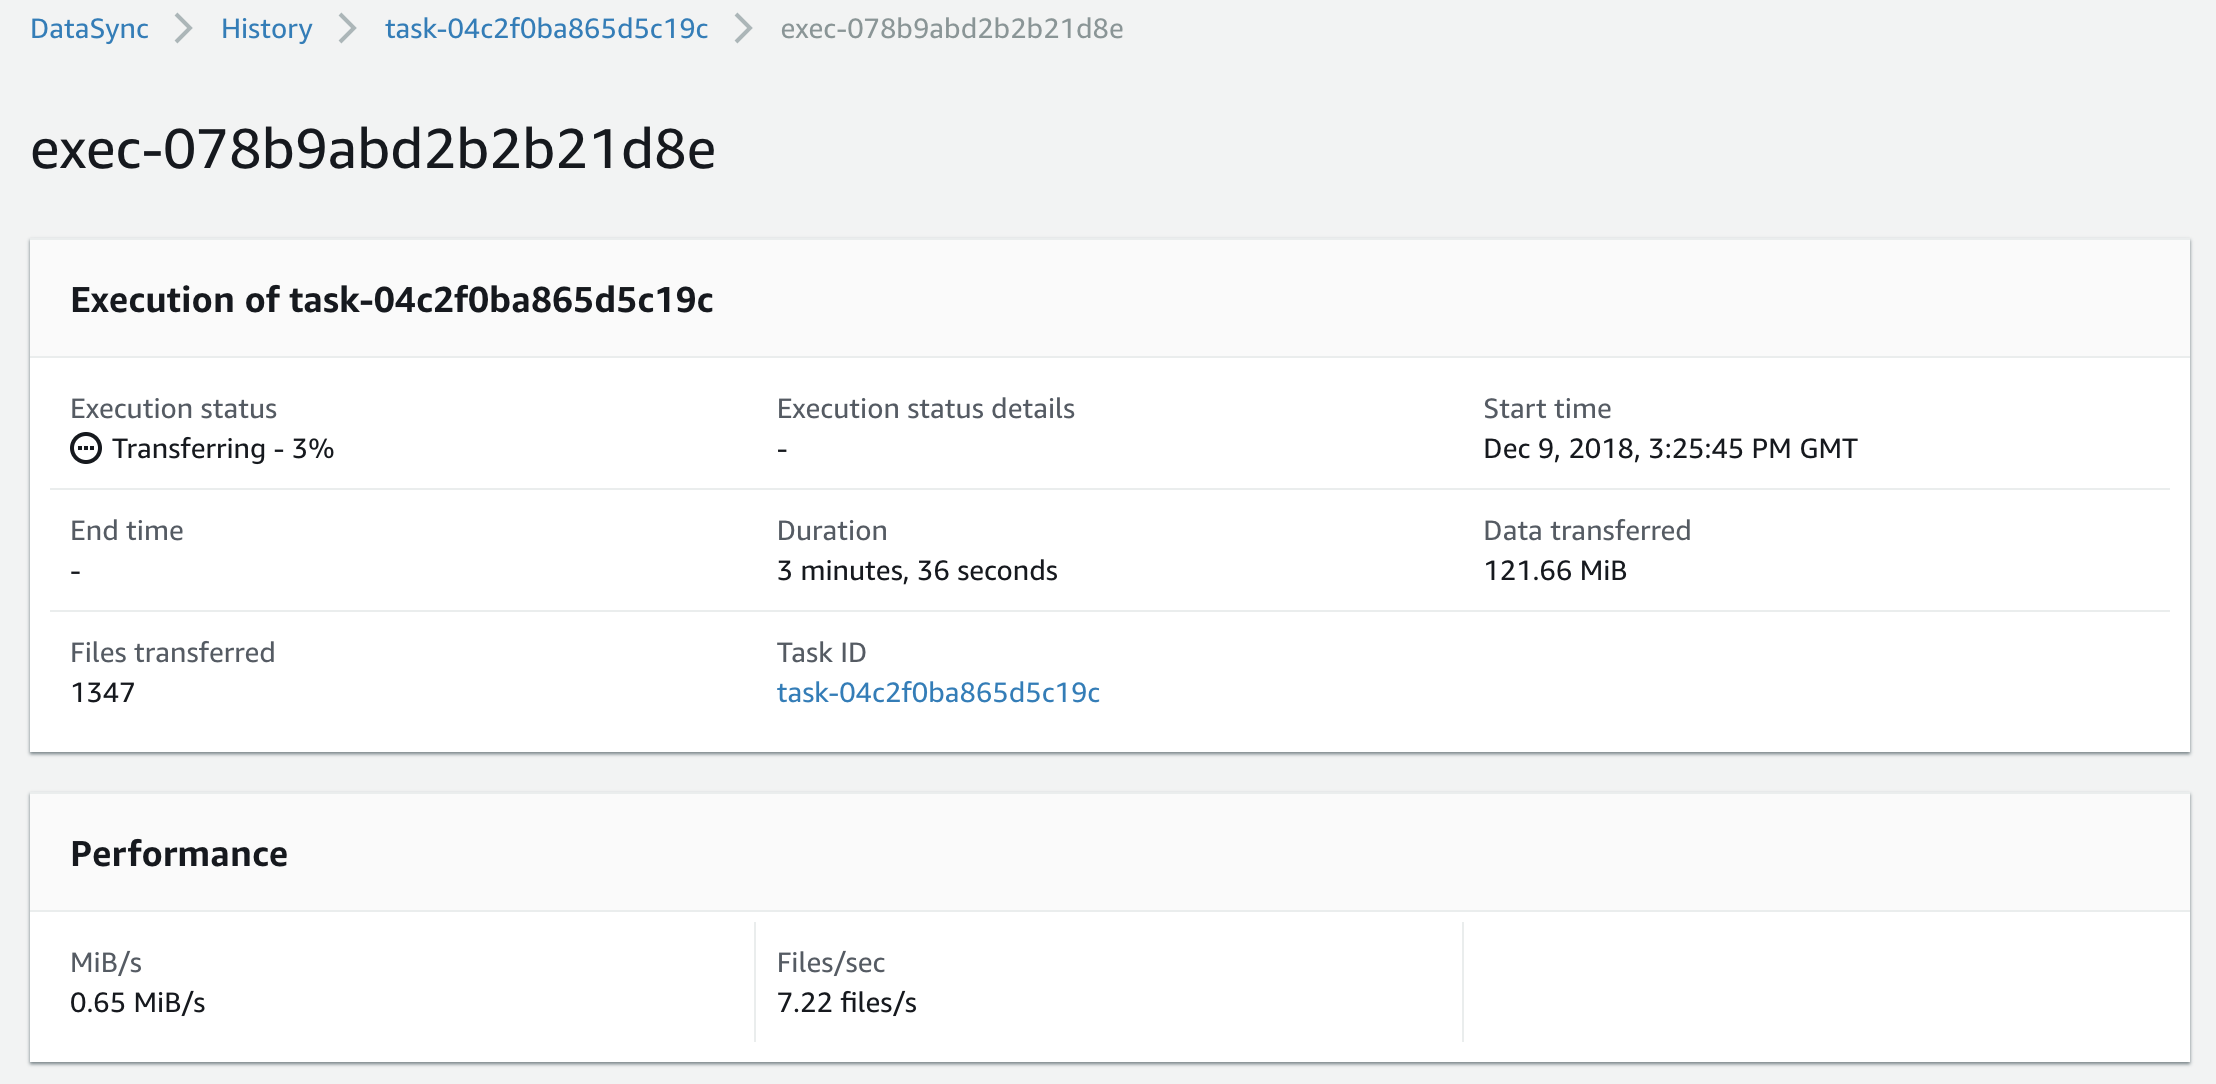
Clicking the execution ID gives us additional details on the task being executed, including the options, source/destination locations, and a little bit more detail on the progress of the execution at the bottom of the page.
Conclusion
I hope the above has given you a good insight into the new AWS DataSync service.
The more astute of you will have noticed that you need to execute tasks manually. There’s currently no ability to schedule a periodic task nor to have an ‘ongoing’ sync (in the sense the Database Migration Service offers), so you will need to execute your sync tasks either by hand or via the API if you want to keep data periodically updated.
I am hoping that AWS will be addressing this limitation in future. I can see why there’s no ‘always-on’ sync option, as the DataSync agent has no way to determine if a file is being modified mid-transfer. In fact the documentation recommends you sync not from your primary file share, but from a read-only snapshot created specifically for the DataSync service to access. It’s still an annoying omission, though.
Are you using DataSync? Have I missed anything? Hit me up on Twitter or via the other social links below and let me know your thoughts.