I recently needed to program a new device on my RFXtrx device, which can only be done using the Windows(ish)-only RFXmngr program. However, my RFXtrx is buried under the stairs, connected to my Home Assistant installation.
Thankfully, it turns out its possible to access the device over the network with reasonably minimal effort, this guide shows you how.
My setup
My current Home Automation (“HA”) setup is a Home Assistant installation running on an Intel NUC, with interfaces for Z-Wave, Zigbee and “generic” 433MHz devices, using an RFXtrx 433E controller.
There is a wealth of different devices using the 433MHz frequency range, and many of these are supported by the excellent RFXCOM RFXtrx433 devices. Most devices I use are receive-only, or are suitably dumb that I only have to generate an ID and send it when I program the end device (i.e. LightwaveRF).
There are some devices that are a bit more intelligent, though…
Somfy RTS devices
I have a number of Somfy RTS devices - roller blinds and my garage door - which require special programming via the RFXmngr software. This is because the control protocol is based on a ‘rolling code’ system, so the RFXtrx needs to keep track of the next code to use when it transmits and the devices need to co-ordinate with each other during initial setup to ensure they’re in sync.
One of the great things about the RFXcom devices is that they have the built-in intelligence for the Somfy RTS protocol, and so the controlling software (Home Assistant, in my case) doesn’t need to concern itself with keeping track of rolling codes, etc.
Somfy devices (at least in the UK) are on a slightly different frequency to normal 433Mhz devices, using 433.42MHz (rather than the much more standard 433.92MHz) so generally either a dedicated device such as the RFXtrx433 is required, or a lot of luck with a standard 433MHz transmitter than can operate slightly out of band.
Making the connection…
The RFXmngr program allows communication with RFXCOMs LAN-based devices, as well as their USB-connected counterparts. It turns out all that the TCP variant does is encapsulates the standard serial packets in TCP and sends them over the wire.
As there is nothing too clever happening with the communications protocol, we
can use the standard UNIX tool socat to act as the “USB to LAN” bridge we
require.
Unfortunately, HassOS (which is the underlying operating system powering my
Home Assistant instance) doesn’t come bundled with socat as a standard tool
(which is annoying as quite a lot of Home Assistant plugins support
communicaiton over socat), so we need to find a way of installing it. With
thanks to Andrew Dunham, who helpfully provides a number of statically
compiled binaries on his GitHub page - we can download a statically compiled
Linux binary for socat. The binary is available here.
Unfortunately, socat is only provided for Linux/x86_64, and not for the arm
architecture required for use on a Raspberry Pi - should you need to use this
method on an rPi then I’m afraid you’ll need to locate your own static binary
(if anyone finds one that works, please let me know and I will update this blog
post with a link).
Installation and setup on HASS
The following commands will download and “install” the socat binary on your
Home Assistant installation.
Please remember you’re downloading binaries from a random person on the Internet, which may be riddled with malware or other nasties - please perform your suitable due diligence before using. For reference, I’ve included the SHA256 checksum of the binary I am using.
$ curl -LO https://github.com/andrew-d/static-binaries/raw/master/binaries/linux/x86_64/socat
  % Total    % Received % Xferd  Average Speed   Time    Time     Time  Current
                                 Dload  Upload   Total   Spent    Left  Speed
100   159  100   159    0     0   1096      0 --:--:-- --:--:-- --:--:--  1096
100  366k  100  366k    0     0  1087k      0 --:--:-- --:--:-- --:--:-- 1087k
$ chmod +x socat
$ sha256sum socat
71c81cb46dd1903f12f3aef844b0fc559f31e2f613a8ae91ffb5630bc7011ef5  socat

$ ./socat -V | head -n2
socat by Gerhard Rieger - see www.dest-unreach.org
socat version 1.7.3.0 on Jun 16 2015 21:24:31
As we can see from the above, we’ve downloaded, made executable and checked the
SHA256 checksum of the file (so at least if I am infected, so are you!) and
confirmed the version of socat that’s been installed. Sure, it’s old, but it
does the job for what we need.
Setting up the tunnel 🐍
Next, we need to configure socat to listen on a TCP port, and redirect
traffic between this TCP port and the USB serial device that represents our
RFXtrx device. I will assume you know how to find this, as I assume you’re
already using the device.
This is as simple as:
$ ./socat file:/dev/serial/by-id/usb-RFXCOM_RFXtrx433_A1K5N6B-if00-port0,raw,echo=0 tcp4-l:3007
But make sure you have updated the path to your specific RFXCOM device or you’ll get an error!
Also note, there will be no output from the socat command.
As HASS OS is all based on Docker containers, and you’re running your SSH session inside a docker container, we need to find a way to expose the port from the host. The quickest way to do this is with SSH tunneling. We’ll be using PuTTY on Windows to establish the connection, but you can use pretty much any SSH client you prefer.
Once you’ve opened PuTTY, on the main connection window (ensure you enter your username/host details first!), navigate to: Connection -> SSH -> Tunnels
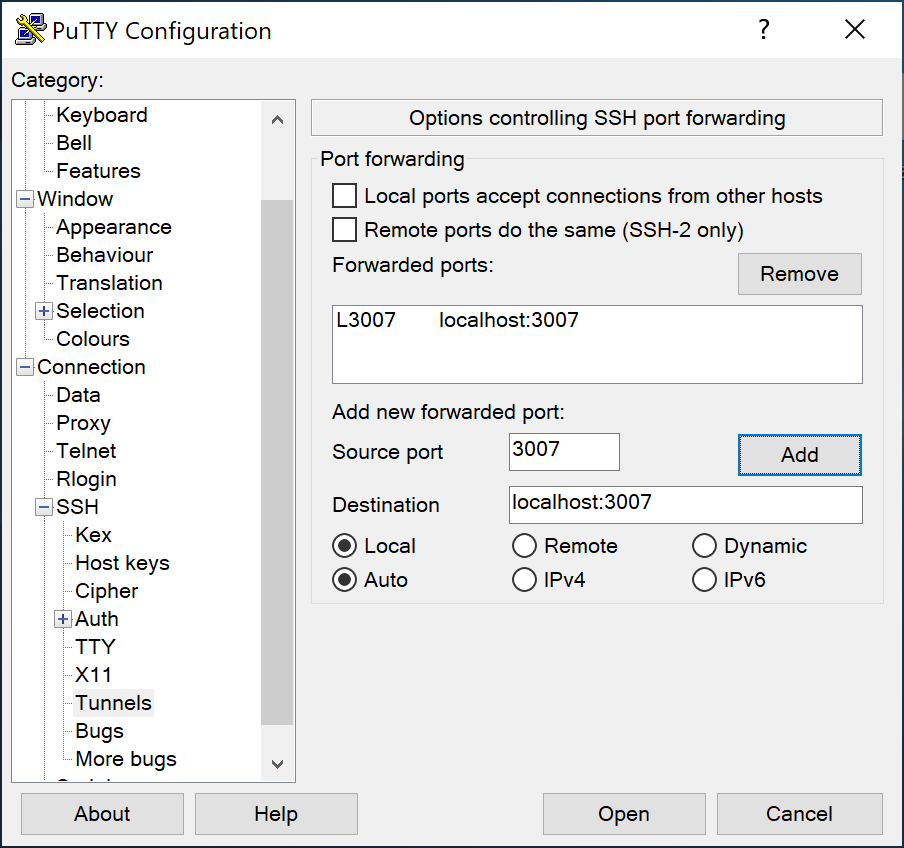
Next, enter the details as they appear in the screenshot above, and make sure you hit ‘Add’! If you’ve changed the port number in the example commands above, ensure you update that, too. If you’ve set it up correctly, your PuTTY window will look like the screenshot above - note the port forwarding details in the large white box.
Once done, connect to your instance via SSH and ensure socat is running:

Now it’s time to connect using RFXmngr. Start the application, hit the “Connect” button and enter the details of our SSH tunnel:
(I am not sure why both USB and TCP/IP are selected here - but ensure you’ve selected TCP/IP and enter the details in the boxes)
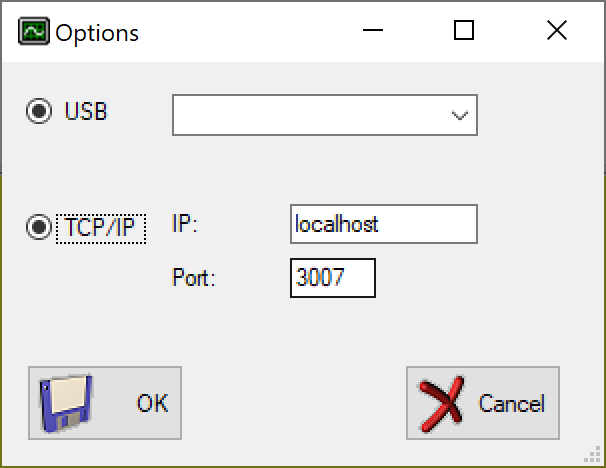
Hit “OK” and you should successfully connect to your RFXcom device:
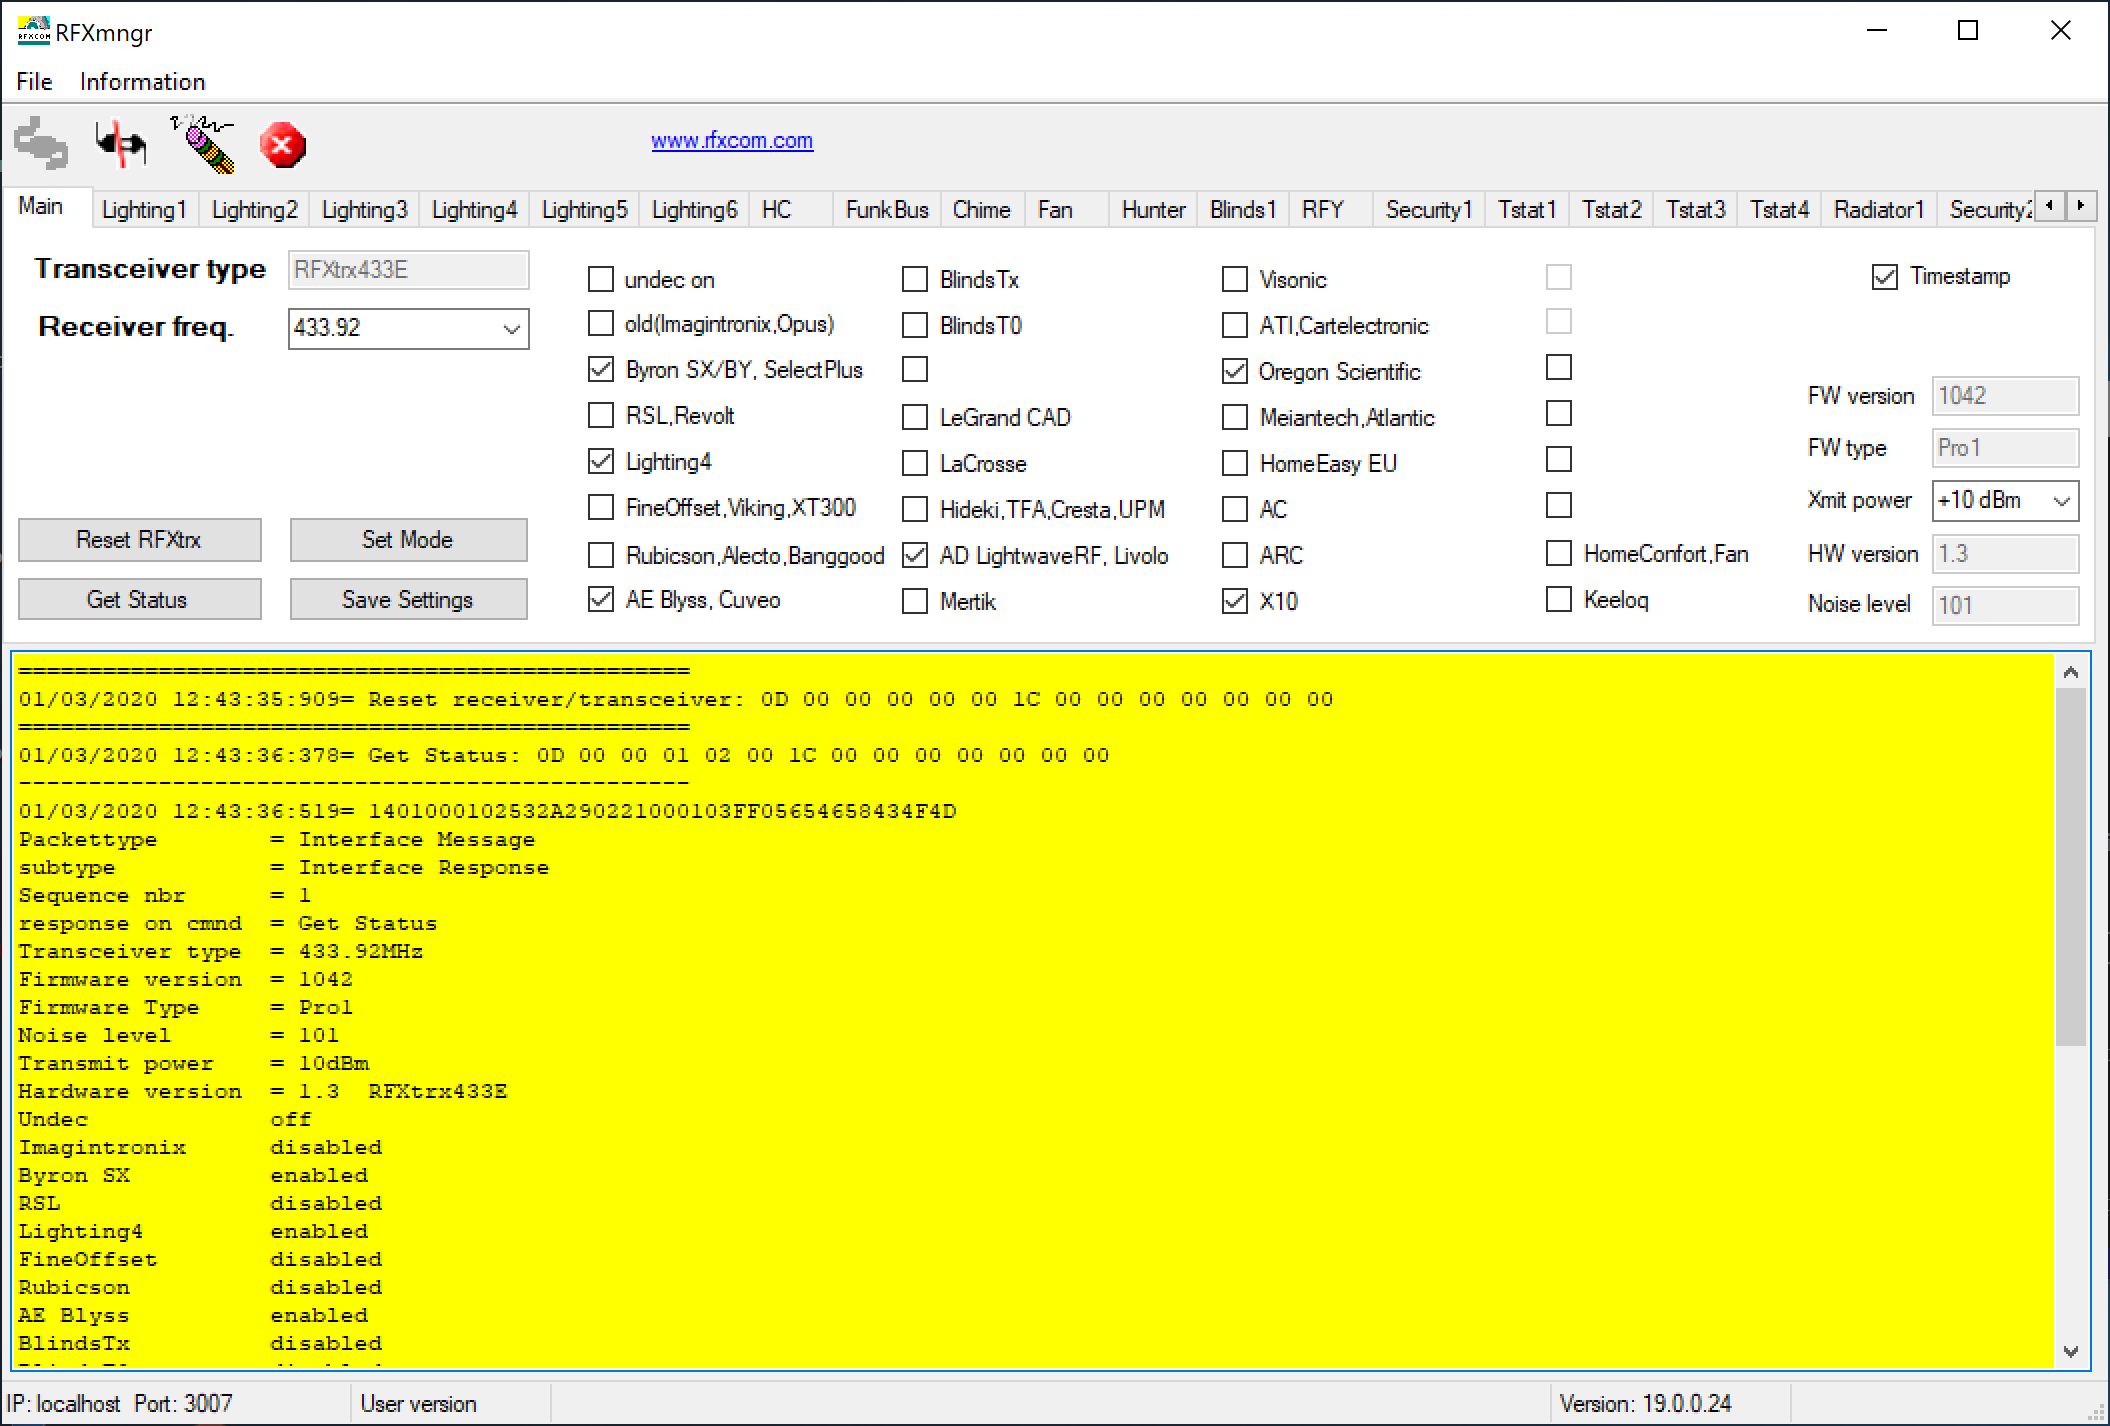
You should really stop Home Assistant while connecting using RFXmngr, but in practice I found it worked “reasonably” well without stopping HA, but YMMV.
That’s it - you can now use RFXmngr as if you were locally connected to your device.
⚠️ WARNING - do not attempt to flash firmware using this method! ⚠️
The RFXflash software allows you to reflash/upgrade the software on your RFXcom device, and also supports the TCP connection method described above, but when I attempted a reflash all I managed to do was brick my RFXtrx433 device and had to battle the dust bunnies and dragons that live under the stairs after all! Thankfully it was easily recoverable, and I learnt a good lesson!